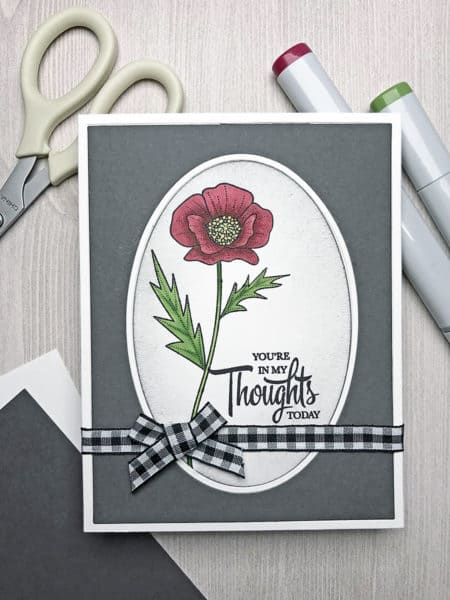
Coloring a Poppy With Copic Markers
 I always find it a little difficult to make cards that aren’t “happy,” do you? It’s easier to make them as an everyday hello or as congratulations on an achievement. But, if you find it tough to get going on an emotional card, sometimes all you need to do is mute the colors a bit to convey your sentiment. And floral designs are always a great option.
This card is special to me since I had a friend pass away just a couple of days ago that I really thought was going to beat the odds. She was a beautiful soul who loved all things flora and fauna, and she was an accomplished mixed media artist as well. While I can’t do the magic she did with pens, paper, ephemera, and a little fire (really!), I can definitely color a poppy in her honor.
Supplies
To start, I gathered up the main supplies:
- Oval Master Frame, Memory Box
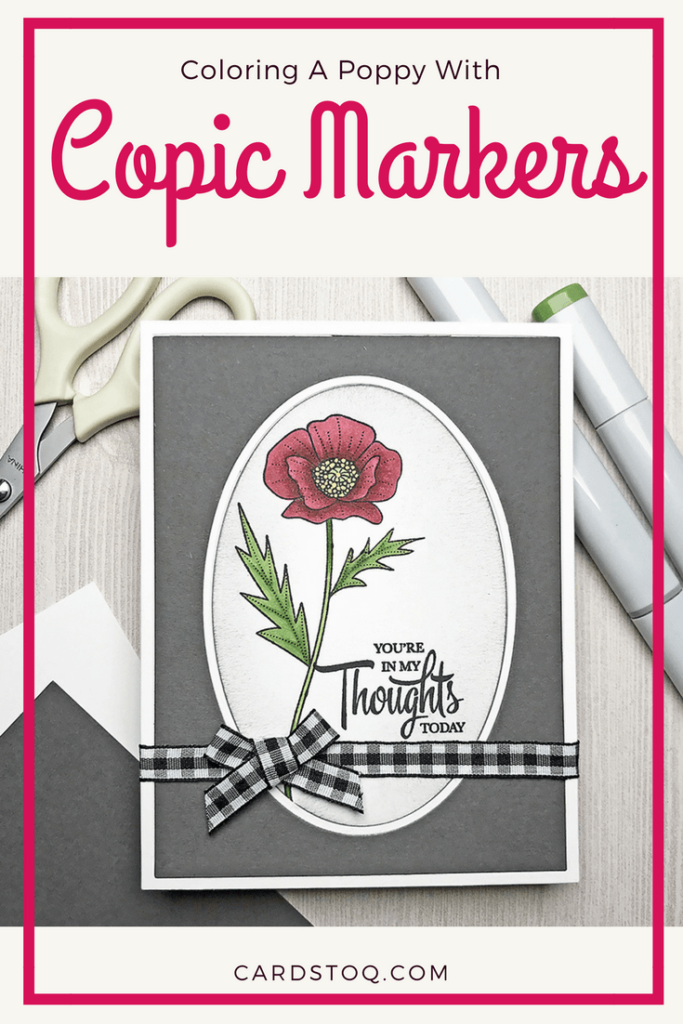
- It’s The Thought Stamp Set, Papertrey Ink
- Stemmed Statements, Papertrey Ink
- Copic Sketch Markers in R56, R59, YG67, and YG63
- White and Grey Cardstock
- Black and Grey Dye Ink
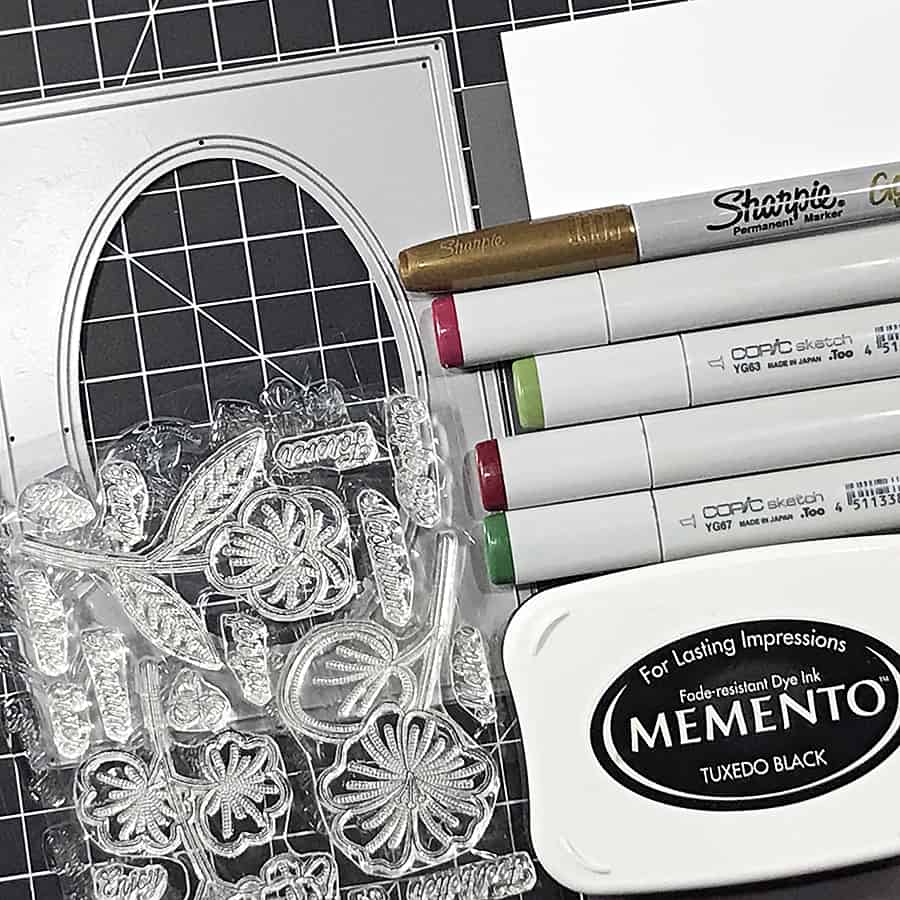
Not everything is pictured here; I added in some extra things as I went along.
Make It
Next, I cut the frame twice – once from Neenah Solar White cardstock, and once from a piece of Basis cardstock in Grey. This particular cover die from Memory Box cuts the paper into four separate sections, so you can mix and match as you create a die-cut inlay style frame.
I put everything together on an extra piece of white cardstock with strategically placed dabs of glue, all except for the oval that goes in the center.

This is the beauty of doing an inlay – if you mess up your design, you can simply re-cut another oval and try again. That way, you can add in the finished piece that you like best without having to redo the entire card!
I went ahead and stamped a flower from the Stemmed Statements set, then used it to line up the sentiment.
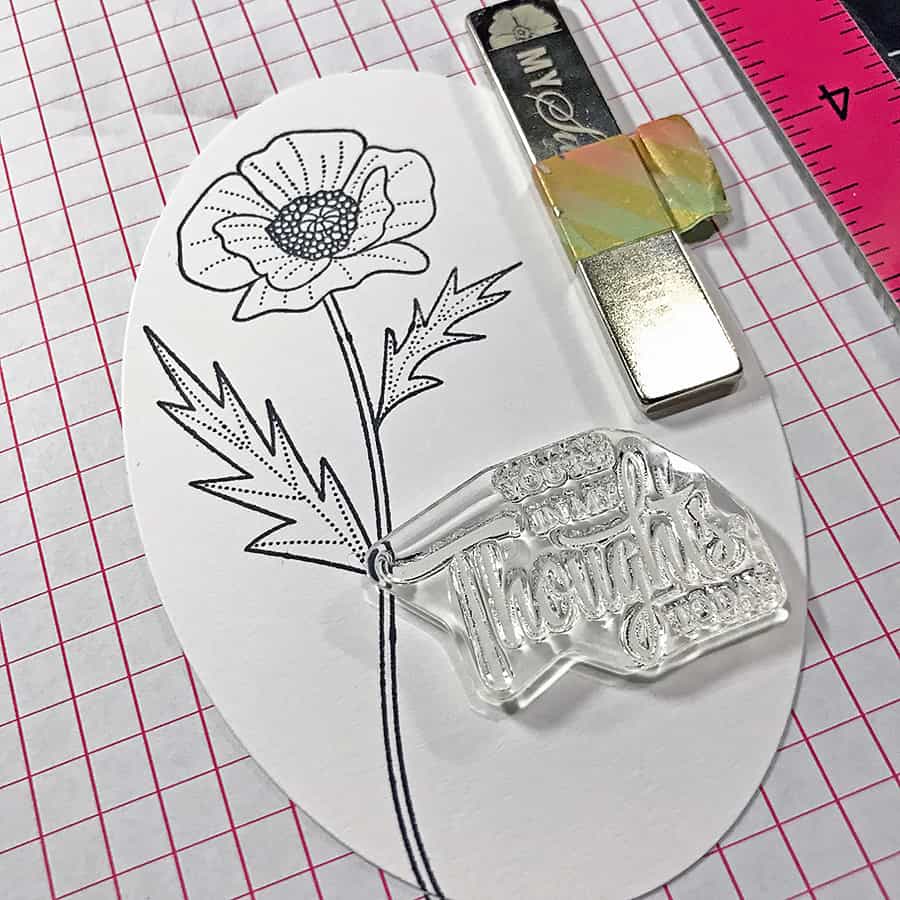
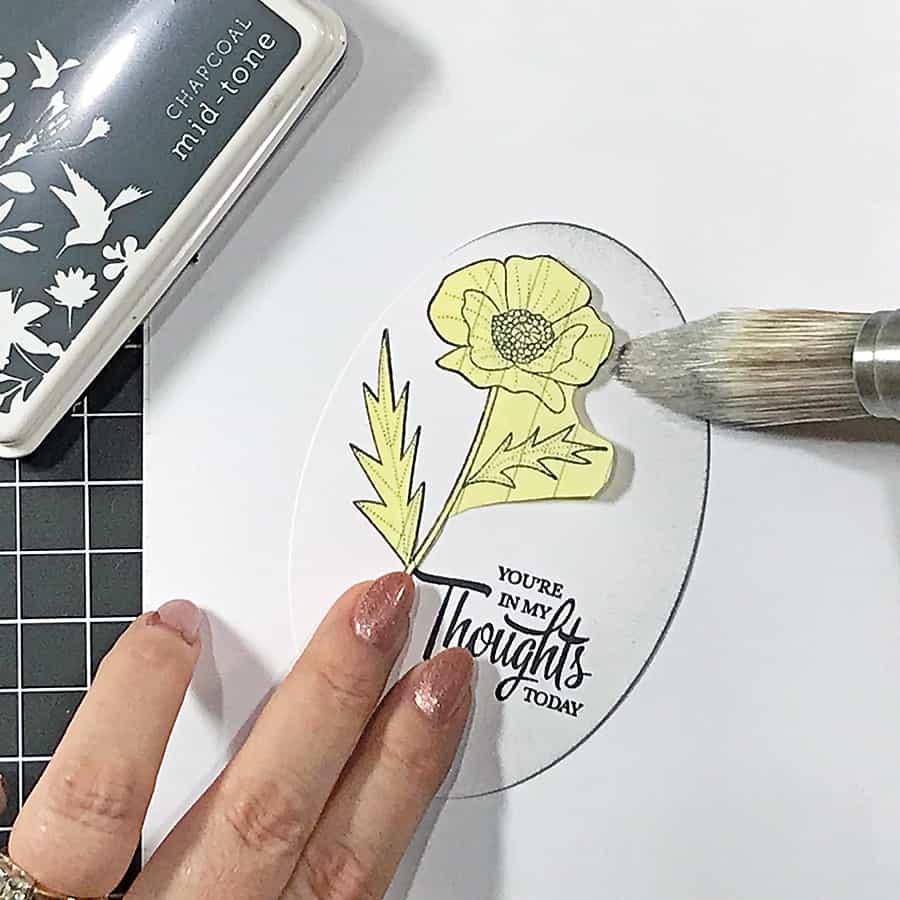
Since the edges are going to be inked, the flower needs to be covered to keep the colors from getting muddy during coloring.
To make a mask, stamp the flower on a sticky note or some masking paper, then fussy cut it out. Stick the mask over your image, and use an ink blending tool or brush to sweep in some Hero Arts Midtone Shadow ink in Charcoal around the edges.
I was trying to go for a “pencil shaded” look, so a medium stencil brush from Clarity Stamps worked better for me today.
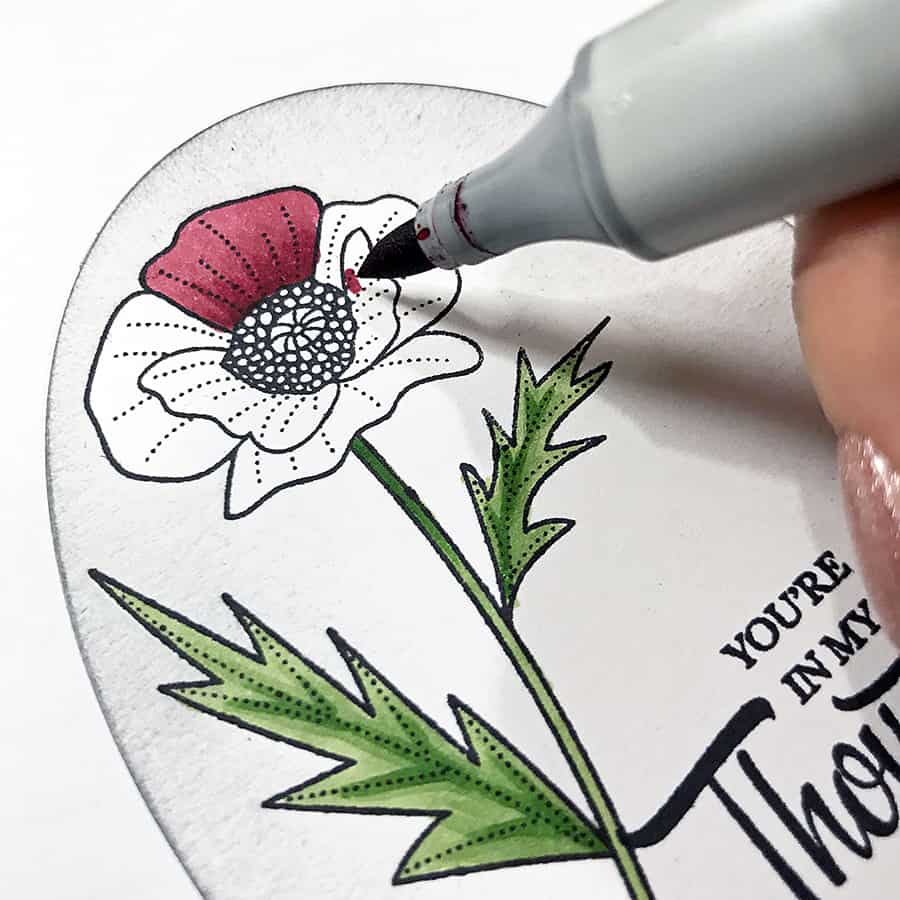
Next, peel off the mask and color the flower. I pulled out my trusty Copic Sketch markers since they blend wonderfully on the Neenah cardstock.
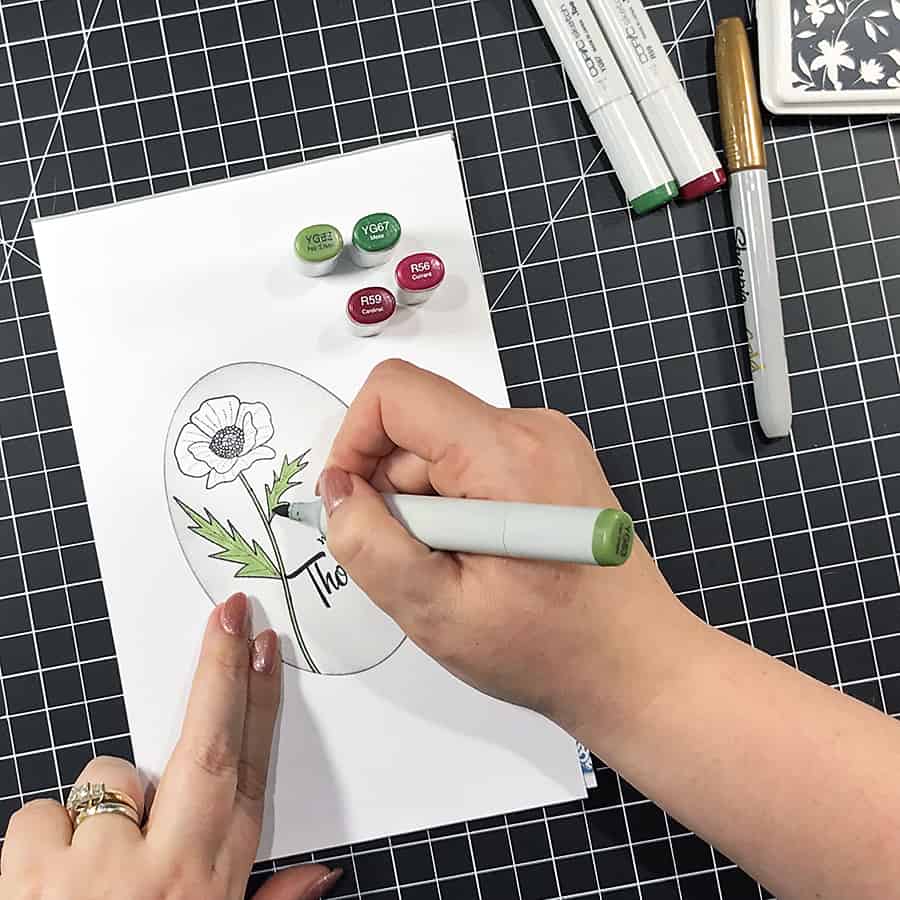
When blending, it’s best to complete small areas one at a time, so the ink doesn’t have time to dry between colors. While the ink is wet, you can get some lovely blending effects with just a couple of markers.
Finishing Up
I wanted to add some type of sparkle, but not something that was outright glitter since that wouldn’t really go with the tone of the card. I chose a gold Sharpie® marker – it added just the right illumination!

Then, I fitted my finished oval into place with a little bit of Aleene’s Tacky Glue and added a ribbon along the bottom half of the card.

Full disclaimer: I can’t tie bows straight no matter how hard I try. I just make them separately and use a glue dot to stick them in place 🙂
Thank you so much for letting me show you how I color a poppy! If you liked this post, please share the love by pinning it to Pinterest for later!
Also, why not take a look at this post? It has some Copic coloring tips, too!

The links below are affiliate links to the products I used today. There’s no additional cost to you, and if you decide to click and shop, I really appreciate the support! Thank you!