How to Cut Fonts with the Silhouette CAMEO
Did you know you can cut fonts with the Silhouette CAMEO? It can be almost any font you have on your computer. Of course, you can use any Silhouette die cutting machine you have (like the Portrait or the CAMEO 3). It beats the heck out of trying to find an alpha sticker to match the style of your project.
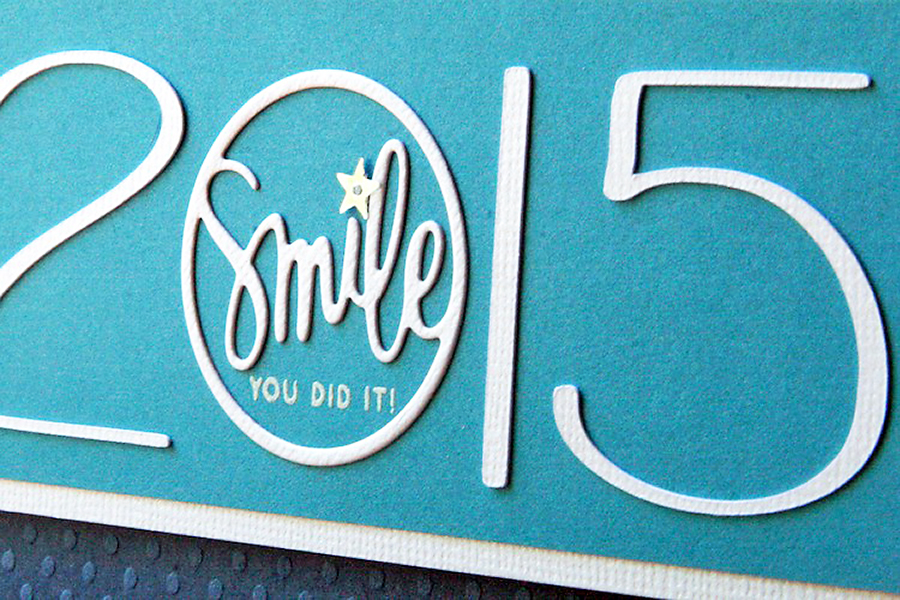
I just received the June 2015 card kit from Simon Says Stamp. There was this really cute little die included. It’s a circle with the word ‘smile’ through the center. The first thing I thought when I saw it was that it would make a great letter “O.”
It was perfect since I wanted to make a card for my niece, who is graduating high school this week. The die would make a great “zero” in 2015!
I didn’t have any type of alpha set that would match the style of the die cut. So, I rummaged through my computer’s font book to see if I could find a font that would work.
The one I liked the most is called Penelope Ann. If you want to check it out or download it for your collection, click here to go to the download page. It’s free for personal use 🙂
To cut fonts with the Silhouette CAMEO, first open Silhouette Studio. Find the little black “A” in the leftmost column of buttons.
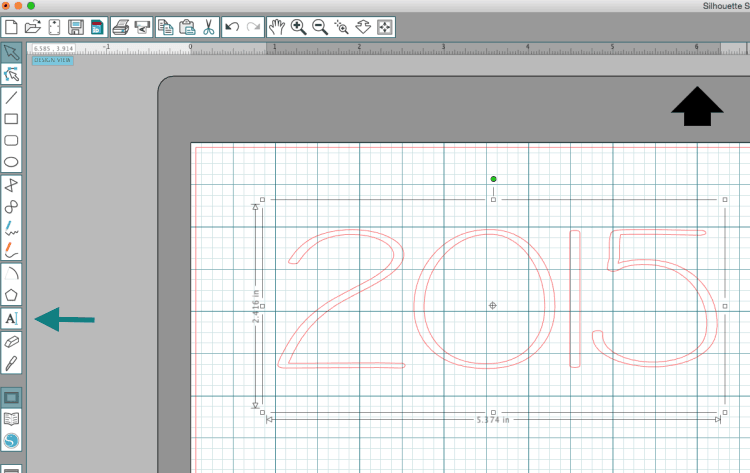
Select it, then just click anywhere on your page and type what you want to cut. When I do this, I type first and adjust the font afterward.
Pro tip: Use the Shape Tool to draw a rectangle the same size of your card or page. You can then see how your letter will fit before you cut them.
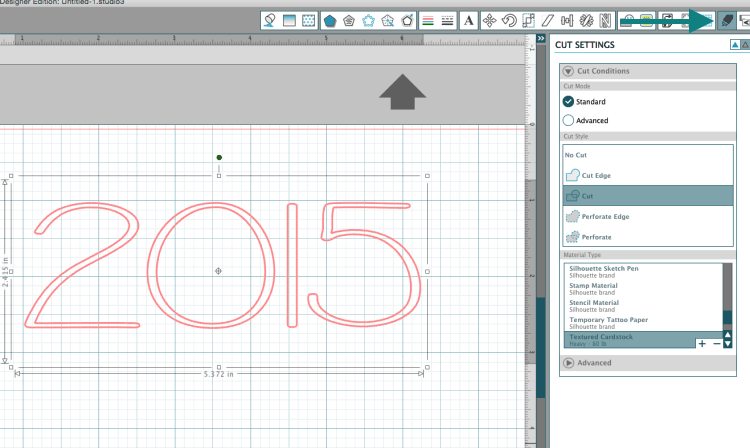
Once you type a word, the right-hand side of your window becomes the Text Style box. To find the font you want, highlight the text you want to change. Scroll in the Font Style section of the right-hand toolbar to find the one you’re looking for. The measurements you see in the picture are the same ones I used for my card.
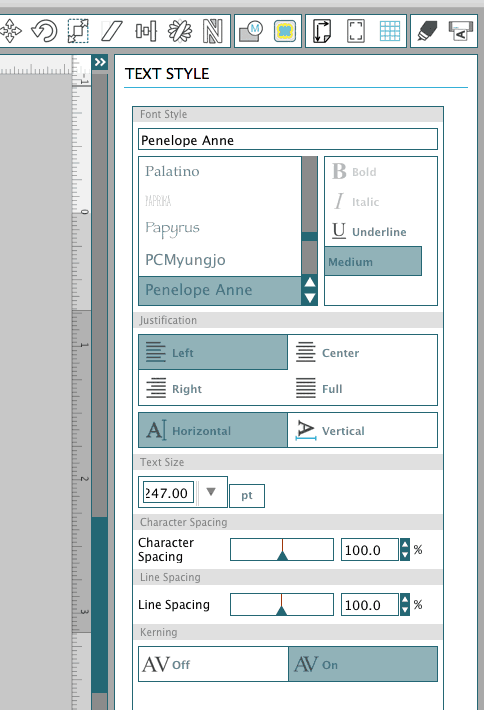
Yep. 247pt.
This size makes the numbers about 1.5″ tall, which is how big the die is – so they should all play nicely together. A word of caution: when you are cutting fonts with the Silhouette CAMEO (or any other Silhouette machine you have), be sure the letters and numbers aren’t too narrow. Otherwise, the blade will just butcher your paper.
To check if the font is too narrow, hit the “cut” button in the top right button row of the Design Studio. It will fade in the cut lines, and you’ll be able to see if your cut will be ok. You don’t want the lines so close they touch. This looks like it will cut fine.
From here, just choose the paper you want and follow the cut settings in Silhouette Studio to cut out your text. You could even cut it two or three times and stack them on top of each other to make a faux chipboard embellishment.
For my card, though, I just cut once and tossed the O, since I was going to replace it with my fancy little circle die cut.
My niece’s school colors are Columbia Blue and Navy, so I chose papers as close to those colors as I could find.
Luckily, a couple of those papers were in the card kit. Using a white cardstock base, I layered the dark blue embossed paper under the patterned gingham paper. It didn’t matter where they met in the center. I planned to layer a 2″ strip of blue (with a 2.25″ strip of white behind it) over the seam.
But before I popped that onto the front of my card, I worked on the layout for my numbers.
Once I had them all in place, I adhered the 2, 1, and 5 with Tombow Mono Multi Glue, then carefully stamped “you did it!” using Versamark, keeping my “O” in place (but not glued yet). Then, I lifted the die cut and sprinkled some white detail embossing powder, and heat embossed the sentiment.

Finally, I glued the circle “Smile” die cut in place and attached the whole strip to the front of the card with foam squares.
Of course, everything is better with sparkle! I had a vial of flat star sequins, which I adhered with dots of Glossy Accents over the top of the gingham paper and also to dot my ‘i.’ And there you have it!
Thanks for stopping by today to check out how to cut fonts with the Silhouette CAMEO and make this sparkly card. Have you ever cut fonts for a project? Leave a comment below and tell me what you made!